之前在本地电脑上部署hexo博客,就是每次更新太麻烦了,在网上看到有很多人使用Action自动更新博客感觉很方便。
1. 复制必要文件 本地目录结构 1 2 3 4 5 6 7 8 9 10 11 blog/ / / / / /
我之前只在source下对博客文件进行git备份
source结构 1 2 3 4 5 6 7 source/ / 404 / /
我现在想只更新source到github,然后actions自动生成静态html,本地只需要有个git环境就可以了。
先将blog文件夹下的一些必备文件复制到source里面
复制 1 2 3 4 .gitignore。 -> source /blog.gitignoresource /_config.fluid.ymlsource /_config.ymlsource /package.json
2. 新建仓库 新建两个仓库,建议都设置为私密的
blog-md :私密,这个用来存储md文件,source文件夹对应的是blog-md,将source里面的文件上传到blog-md中
blog-web: 这个用来存储html文件
生成秘钥 1 ssh-keygen -f github-deploy-key
一路回车,会在当前文件夹生成github-deploy-key与github-deploy-key.pub
将私钥 github-deploy-key 的文件内容添加到 blog-md 仓库的 Settings → Secrets and variables → Actions -> New repository secret 页面上,Name 为 HEXO_DEPLOY_PRI (后面的代码要用到这个名称 )。
pub是公钥,将pub复制到gtihub的blog-web仓库的 Settings → Deploy keys → Add deploy key 页面上,Title 为 HEXO_DEPLOY_PUB,勾选 Allow write access 选项。
3. 创建Workflow source下新建.github
1 2 3 4 5 6 7 source.github/ deploy .yml.git/
deploy.yml 1 2 3 4 5 6 7 8 9 10 11 12 13 14 15 16 17 18 19 20 21 22 23 24 25 26 27 28 29 30 31 32 33 34 35 36 37 38 39 40 41 42 43 44 45 46 47 48 49 50 51 52 53 54 55 56 57 58 59 60 61 62 63 64 65 66 67 68 69 70 71 72 73 74 75 76 77 78 79 80 81 82 83 84 85 86 87 88 89 90 91 92 93 94 95 96 97 name: CI on: push: branches: - master env: GIT_USER: xxx GIT_EMAIL: xxx@gmail.com THEME_REPO: fluid-dev/hexo-theme-fluid THEME_BRANCH: master jobs: build: name: Build on node ${{ matrix.node_version }} and ${{ matrix.os }} runs-on: ubuntu-latest strategy: matrix: os: [ubuntu-latest ]node_version: [18. x ] steps: - name: Use Node.js ${{ matrix.node_version }} uses: actions/setup-node@v3 with: node-version: ${{ matrix.node_version }} - name: Install hexo with dependencies run: | npm install -g hexo-cli hexo init npm install hexo-deployer-git --save npm install hexo-generator-sitemap --save npm install hexo-abbrlink --save npm install hexo-generator-feed --save - name: Checkout uses: actions/checkout@v3 with: ref: master path: source - name: Checkout theme repo uses: actions/checkout@v3 with: repository: ${{ env.THEME_REPO }} ref: ${{ env.THEME_BRANCH }} path: themes/fluid - name: Install hexo with dependencies run: | mv source/_config.fluid.yml _config.fluid.yml mv source/_config.yml _config.yml mv source/package.json package.json mv source/blog.gitignore .gitignore npm install - name: Configuration environment env: HEXO_DEPLOY_PRI: ${{secrets.HEXO_DEPLOY_PRI}} run: | sudo timedatectl set-timezone "Asia/Shanghai" mkdir -p ~/.ssh/ echo "$HEXO_DEPLOY_PRI" > ~/.ssh/id_rsa chmod 600 ~/.ssh/id_rsa ssh-keyscan github.com >> ~/.ssh/known_hosts git config --local user.name "github-actions[bot]" git config --local user.email "41898282+github-actions[bot]@users.noreply.github.com" - name: Deploy hexo run: | ls -a pwd hexo clean hexo g -d ls -a - name: Update Blog run: | cp _config.fluid.yml source/_config.fluid.yml cp _config.yml source/_config.yml cp package.json source/package.json cp .gitignore source/blog.gitignore sh "${GITHUB_WORKSPACE}/source/.github/script/blog-update.sh"
为啥上面一会mv一会cp呢?
因为我要构建hexo的文件结构,要不然部署会失败。
有一些文件不能上传到web仓库里面,所以在部署前要移出,在判断是否更新博客源码时移入,不移入的话下回actions就会执行失败。
使用hexo-abbrlink会在md文件中添加abbrlink内容,所以需要将改变后的文件push到md仓库中。
blog-update.sh 1 2 3 4 5 6 7 8 9 #!/bin/sh cd source if [ -z "$(git status --porcelain) " ]; then echo "nothing to update." else "triggle by commit ${GITHUB_SHA} " -afi
在_config.yml里面配置
1 2 3 4 deploy: type: 'git' repository: git@github.com:用户名/blog-web.git branch: main
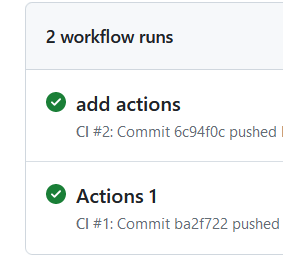
4. 成功
5. push 1 2 3 git add ."actions test"
注意事项 每次push前先pull。
当前blog系统:本地编写md -> push md到blog-md -> actions -> push html到blog-web -> 推送到vercel,即可通过域名访问。
error: remote origin already exists.
origin这个名称重复,
1 2 3 4 5 6 7 8 9 10 git remote rm origin git remote add origin https ://github .com /${{ github .repository }}.git git remote set-url origin https ://github .com /your_user /your_app .git git remote add NEW_NAME https ://github .com /your_user /your_app .git push 时也要换成 git push -f -u NEW_NAME main
fatal: unable to access ‘https://github.com/ ‘: the requested url returned error: 403
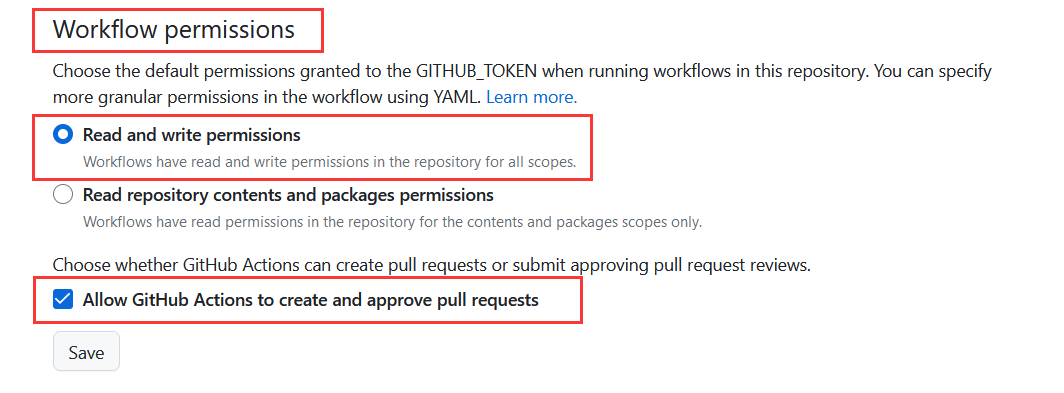
如果执行git push后出现403(更新md文件),需要打开对应md仓库,链接:https://github.com/ <用户名>/<仓库名>/settings/actions
actions也可以使用https协议提交
1
2
3
git remote add origin "https://$ {{ github.actor }} :$ {{ secrets.GITHUB_TOKEN }} @github.com/$ {{ github.repository }} " # 或者 git remote set-url origin "https://$ {{ github.actor }} :$ {{ secrets.GITHUB_TOKEN }} @github.com/$ {{ github.repository }} "
也可以使用ssh,不推荐。
1
2
git remote add origin ssh ://git @github .com /${{ github .repository }}.git git remote set-url origin ssh ://git @github .com /${{ github .repository }}.git
参考文章:
https://blog.kukmoon.com/f8bb4ee/
https://blog.csdn.net/qq_44275213/article/details/128857688
https://docs.github.com/zh/actions/learn-github-actions/essential-features-of-github-actions
https://stackoverflow.com/questions/10904339/github-fatal-remote-origin-already-exists
https://stackoverflow.com/questions/7438313/pushing-to-git-returning-error-code-403-fatal-http-request-failed